8N Wiring Directions, Form No. 21447, included with Lighting Kit-
Tim Daley(MI)
 |  |
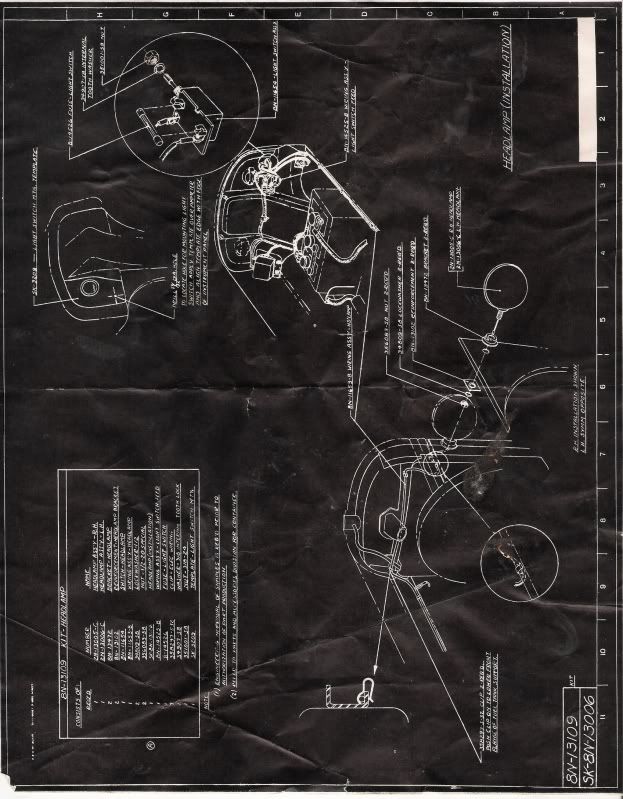
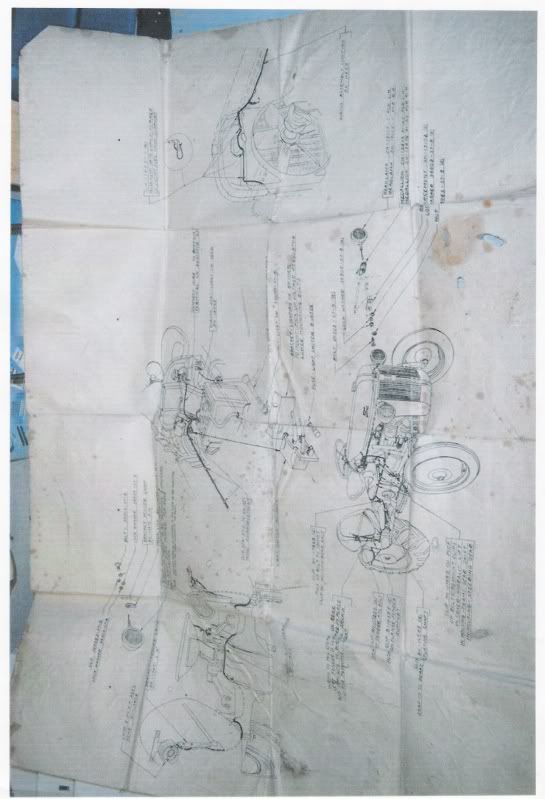
The original Ford Tractor Dealer lighting kits all came with an instruction sheet or two, at least for the 9N thru 8N. The kits all contained the lamps, switch, wires, hardware and clips needed to install the lights on your tractor. I am fortunate to have an original NOS 8N kit including a set of teardrop Tract-O-lites, a DUOLAMP tail light, and switch, all in the original Ford box they came in and it included a sketch and drawing of the hook-up procedure. Unfortunately the drawings, one is 17" x 24", one is 17" x 22", and the 9N sketch is 12" x 15" - are all too large to scan and post for most of us to download to our standard 8-1/2 x 11 printers. I am trying to convert them to a DFX file but then you would need a plotter to get an actual size sheet. Most of us do not have a plotter setting in our computer room so that still isn't going to help you getting a good copy. There is one sheet, the SK-8N-13006 sketch that is a copy of the original blueprint. Many of you might remember way back when, prints were made with a dark blue background with white lettering and drawing lines. That is what this is only it is black and white as it is a mimeographed copy. I'm dating myself here! Anyway, I'll at least post what I can for now. There is also a scan of a picture of one of the 8N sheets, though too small to read, it gives you an idea of what is on the drawings. The sketch has a parts list, but even this is very small to read. Now the lights, clips, and wiring, all very good reproductions, are available from Dennis Carpenter and Just8Ns. Assuming you already have the lights, you will also need the wiring, which is offered in five styles including one for the '53/'54 NAA. You can get a harness to both headlights and either one or two tail lights. Some owners like to run just one wire and have their tail light and worklight both on the left fender. Personally I would opt for the dual setup so you can have a tail light on the left fender and a work light on the right fender, or two tail lights, though you don't have to use both at first, but it is there in case you ever decide to add one later. It is good to remember that the first 9N kits with the C.M. Hall headlights and the TAURUS tail light specified you either could use both lamps as headlights, or take one and use it for a worklight on the rear fender. This was because the early electrical charging systems were not designed to power anything more. With total current used, a separate work light with the ignition system and three other lights would actually exceed the amperage draw. Ohm's Law at work. These early charging systems often had the -20/+20 ammeters and the 'A' style generator and cutout. Back to wiring, next, you'll need 7 clips that will hold the headlight wire to the fuel tank support flange and also along the hood lip and routed up around the radiator shroud. However, the 9N, having a different radiator, shows no clips holding the wire on its sketch. It is just looped around the top of the radiator in the 9N sketch. I would feel comfortable if I did have the wire secured somehow so I'd get creative. The clip part number is 358297-S7, although the 9N sketch shows these clips to be part number B-14506. Carpenter does not list such a part, however their catalog description says the 358297 clips can used for '39-'52 model years. Carpenter lists a 352457-S100 clip to be used on '53-'54 Models, 7 required. I do not have a NAA wiring drawing so I can't say exactly where they're placed. I will post a scan from the '53-'58 MPC that shows a basic wiring setup for NAA and Hundred Series tractors. There are two clips that hold the wire to the brake actuating shaft, part number 8N-14565, as the wire runs behind the fender and up to the hole that feeds the lamp. A pair of plastic wire wrap ties would work too. Behind the fender you'll need one B-14585 clip that holds the wire to the fender support flange. I feel this is an important piece of hardware because it keeps the wire out of harms way of trash and rocks getting trapped up inside and tearing it off. When using dual wiring harnesses you'll need to use one on the right fender too. Also needed are 6 clips that bolt to the top cover housing with the existing bolts and are really guides for the wire to follow from the switch back to behind the drivers seat. This is part number 9N17668 and used '39-'52. There is a mating hole in the two housings; the tranny housing and the diffy housing. The wire will run thru it up around the Postion/Draft Contol handle on its way to back behind the seat and down to the brake shaft. The 8N kit also contained a light switch, fuses, the wings or cups and their mounting plates and hardware, and a template that fit over the ammeter for drilling a 13/32 hole at the 7 o'clock position from the ammeter in the dash for the switch to mount. Some dashes were stamped with a dimple here. Many a dealer and/or owner found it more convenient to mount the switch below the horizontal bend and at the upright portion of the dash near the key switch. I'm not sure but it may have been in '49 when the change was made to mount the light switch under the Voltage Regulator on the right side of dash. You can purchase the bracket from DC or Just8Ns too. All the Master Parts Catalogs have a basic wiring diagram for the lighting kits, but these drawings contained in the kits are a little more detailed and easy to understand. I've found it is a little difficult to decipher the MPC's artist sketch renderings at times. It is possible I could make full copies of these at Kinkos and offer them to members for a fee for postage and reproducing. Let me check on prices and get back. Meanwhile I will also work on finding a way to get them posted in case you do have a plotter.
Original SK-8N-13006 Lighting Kit Wiring Sketch-
8N Wiring Directions, Form No. 21447, included with Lighting Kit-
Tim Daley(MI)
| |
Posting not permitted in the forum archives.<1276959843">